Showing posts with label holiday. Show all posts

Sunday, March 17, 2013

Sassy DIY Easter Tree

Holiday trees aren't just for Christmas anymore!  This DIY tree is too cute (and easy) to pass up for Easter!  You've simply GOT to try it ;)


Materials needed: false Easter eggs from a local craft store, floral foam, ribbon, hot glue, sticks from the yard and a decorative bin to put the tree in, along with some moss to add to the bottom of the tree.


To add ribbon to the eggs in order to hang them from the tree, simply place a dollop of hot glue on the end of the egg.  I added some ribbons tied in bows and some tied in knots for variation, as shown.


For the ribbons tied in bows, simply tie them around a small cup and in a bow for equal sized hanging ribbons!


Here's what all the completed egg ornaments look like!


Next, prepare the bin the tree is going to stand in.  This is where the floral foam and moss come into play.  


 You need to insert the sticks into the foam so they stand up straight to hold the ornaments.


Your completed tree will look something like this!  I hope you enjoy!


Happy Easter, sassy ladies!


Thursday, December 20, 2012

Frosty the Snowman Stops By...

Surprise your kids with a fun visit from Frosty himself this winter!  Here's how!


This exciting visitor is so easy to make come to life for your kids in your bathtub!
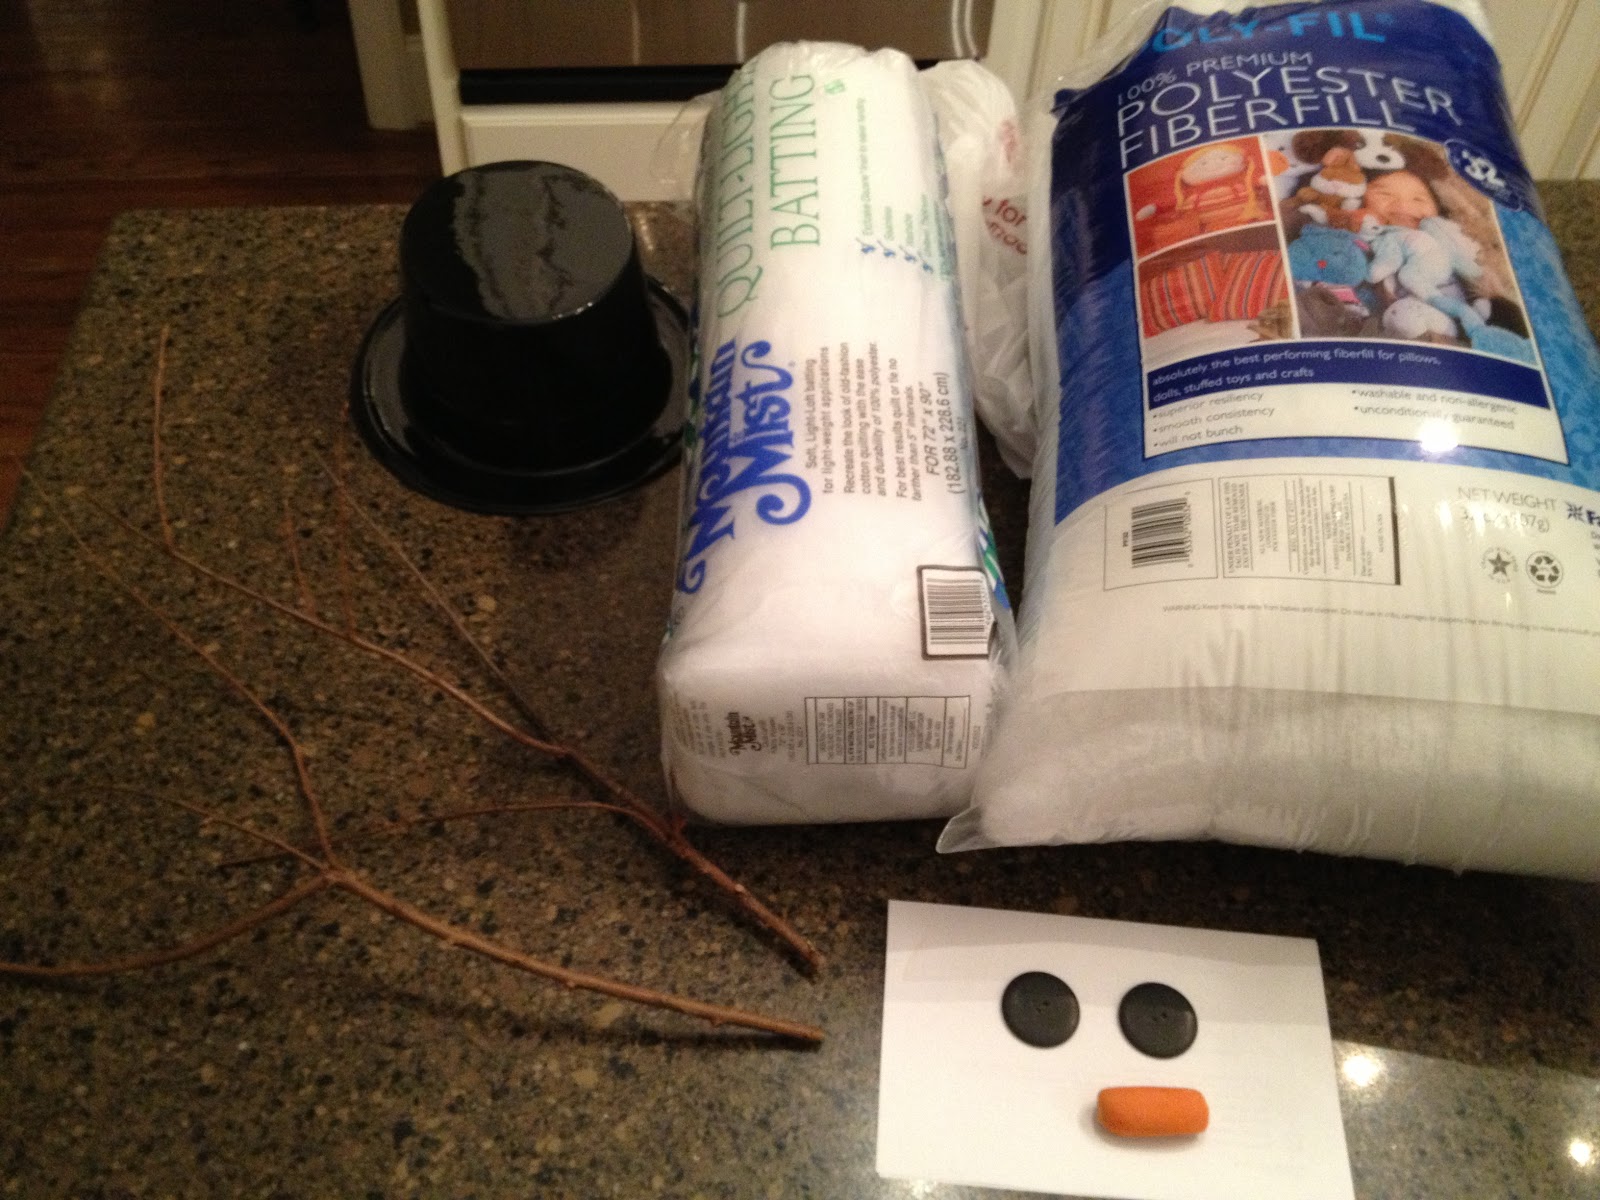
You will need:
-2 large buttons for eyes
-1 carrot for nose
-a scarf
-a top hat (ours was a NYE hat from Party City for $2.99)
-quilting batting
-2 sticks from the yard for arms
-loose pillow batting
-styrofoam half moon (hollow on inside)
-toothpicks
-a bathtub
-hot glue & gun
-towels


First, glue some of the loose pillow batting on the convex side of the half moon.  This will be Frosty's head/face.  Be careful, the batting is thin and the glue is hot!
Glue the top hat on Frosty's head.  The cut out part will be against the wall of the tub, so make sure the hat is more in front of the head.
Now, glue the buttons on as Frosty's eyes.
Last for the face, stick a toothpick into a baby carrot.  Insert the carrot into the styrofoam and Frosty's face is all done!


Now for the body.  First, I recommend putting some towels in the the tub as fillers.  Then rip up about half the bag of the loose pillow batting to fill the tub.  Next use the quilting batting to lay over the pillow batting.  Then use the rest of the pillow batting to fill the tub.  


Lay Frosty's head in, wrap the scarf around his neck, add the twigs in the sides and you're all set to show your kids who came to visit!


Frosty can be enjoyed all winter long-- he will never melt ;)

Tuesday, December 18, 2012

Special Reindeer Food

Making reindeer food is an easy and fun craft to turn into a tradition for you and your little one!  You can make these bags of food for your kid's friends and keep one for your house!  Put out this special mix on Christmas Eve so Santa's reindeer will be sure to find your house and so they will have a treat to eat while Santa is putting presents under your tree :)


This craft is super easy to make.  You can use almost any ingredients you have in your pantry!  I used Cheerios, sprinkles, dry oatmeal and marshmallows to ensure that everything was edible just in case any of the young children I made this with decided to eat the ingredients.


In years past, I have used glitter, Fruit Loops (any type of cereal works great), and candy!
Make sure you have little baggies to put the mix in.  I happened to have clear gift bags but small Ziploc bags work great as well.


If you're giving a bag away, be sure to add a tag explaining what this special mix is!  I printed one from Thomcat Studios (see below).


Printable tags from the thomkat studios

Be sure to put this bag in a special place so you don't forget to sprinkle it in your yard on Christmas Eve!  Santa's reindeer will surely get into this treat!


Monday, December 17, 2012

Oh, Christmas Tree

I decided to post some of my Christmas tree decorating tips.


This is the tree in the center of our music room.  I used five different types of ribbon on this tree to create dimension.  I have a satin brown ribbon with silver and a mesh copper/bronze ribbon running from top to bottom around the tree.  This elongates the tree.


Extra ribbons can be tied or twisted into bows and added into the tree for extra fullness.


Then I created these "pinwheels," which are made out of three different types of ribbons.  One brown, one burlap, and one copper, each 9-10 inches long.  They are twisted and bound together in the middle with metal craft floral wire.  Cut the ends at an angle and spread these around the tree.  Use them as fillers to hide holes in the tree where you may be lacking ornaments.


This is a non-traditional tree topper.  It is made of ribbon, feather picks, and other whimsical picks. You can use anything festive to create this fullness at the top of the tree, just look around and see what you have!


This tree is just for fun!  It has ornaments that my kids have made and collected over the years.  


This topper was made with a large amount of ribbon, feathers, and whimsical picks.
To make the ribbon appear as a large bow, simply gather large pieces of the ribbon and create loops which you twist onto the branches of the top of the tree.


This tree's unique topper has sticks from crape myrtles I have in my yard.  I spray painted them silver to match the theme of the tree and inserted them into the top along with the ribbon.


Saturday, December 15, 2012

Tree of Photos

This was a little tree I had in my attic that I decided to decorate!  It has one photo of each of my children every year until age 21 as a framed ornament.


I placed in the tree in a silver planter.  Then I weighed the tree down with a few bricks inside the planter.  I filled the space with some metallic fabric, but you can use any items around the house such as big ornaments, fake fruit, or a natural grapevine wreath.


The topper is an initial that I bought at Hobby Lobby that I spray painted.  I made the bow with leftover ribbon from my other Christmas decorations.  I added white lights and used a timer to turn them on with the rest of my decorations.


The frames are from Hobby Lobby (they cost $2.99-$4.99) and came ready to hang with the silver ribbon on them already.  I chose 3 different styles of frames to keep consistent.  On the back of each frame I wrote the year and age of that child that year. 


I hope you enjoy this fun tree full of memories :)


Friday, December 14, 2012

DIY Christmas Light Craft

These little gems are something I enjoy displaying year after year.  The kids love to make them and each one is unique- no two are alike!


For this craft, all you need are lightbulbs, ribbon and paint.  You can save up lightbulbs that have burnt out over the year and use those to paint!


You simply use acrylic paint and a small paintbrush to paint the lightbulb (which can be any shape or size).  Then tie some ribbon the the end and you have a cute crafted light!
You will want to paint the year and maybe kid's initials to remind yourself when this craft was done!

Thursday, December 13, 2012

Frosty the Snowman Wreath

Frosty the snowman is a jolly happy soul :)

I hung this cute snowman wreath in the space between my two garage doors, but you can hang it on a screen porch, patio or back door all winter long!  Frosty is so cute lit up at night!


Gather three different Christmas wreaths- small, medium and large.  Link wreaths together by twisting wreath appendages to hold each other.
Add white lights (I had extra in my attic).
Add a cute hat and be sure to stuff it with plastic grocery bags so it stands up on Frosty's head!
Tie a scarf around his neck, too!
Grab an extra pair of rain boots and fill them with rocks so they stand up and don't fall over.


Don't forget to put your lights on a timer so they turn on with the rest of your festive holiday lights!  (see "Christmas Garland on Stairs" post for more details)

Sunday, December 9, 2012

Sweet Gumdrop Tree!

This easy craft is sure to be a favorite among your children this holiday season!


To create these gumdrop trees, you only need a few items:
  • styrofoam cones (available at local craft store)
  • toothpicks
  • gumdrops


Set the styrofoam cone flat side down- this will be your tree.  
Break the toothpicks in half, adding the gumdrops to each toothpick.  Stick the remaining part of the toothpick into the cone.  It's easiest to start from the bottom and work your way to the top of the tree, and it's easiest to work in rows, moving from right to left.

To preserve your tree for future years, spray it with clear acrylic spray paint (also available at a local craft store).  Then cut out round piece of felt and write your child's name and year on it and glue it to the bottom of the tree, for memory's sake.


Remember, this sweet treat is for looks only!

Saturday, December 8, 2012

Sassy Ornament Craft for Kids

Here's a fun way to pass time with your kids and create a holiday memory.


Buy a box of ornaments from a local craft store.  Shadow proof or glass will work.  The ones I used below are shadow proof.


1. Santa's Sleigh:


Using acrylic paint and your children's thumb, create Santa's sleigh with three red thumbprints, and Santa's face with one pink thumbprint.  Add a beard with white paint, and add white and red paint for hat with paintbrush.  Once dry, use Sharpie markers to embellish. 


For the reindeer, use two brown painted thumbprints for the body.  Add jingle bells with yellow paint and of course, red paint for Rudolph's red nose! Once dry, embellish with black Sharpie.


For best results, hang ornament to dry.

2. Snowman Hand:


Paint child's entire hand with white acrylic paint.  Let the child grab the ornament with their hand (carefully).  Once dry, paint hat, scarf and button embellishments with a tiny paintbrush.


For best results, hang to dry.

Don't forget to add child's name/initials and date/year!


Christmas Recipe Gift Idea

This is a fun and savvy way to give away your favorite recipe as a Christmas gift!


First, get out your favorite recipe and type it out as I have:


You will need the dry ingredients, some cute cooking utensils (I used measuring spoons), a festive hand towel, some ribbon (I used burlap) and of course, the giant glass measuring cup.


Place the hand towel in the measuring cup first, then add all the goodies!  Don't forget your recipe!


Violá.  You have the perfect gift for a teacher, friend, neighbor or anyone that likes to cook!

Merry Christmas, sassy chef!